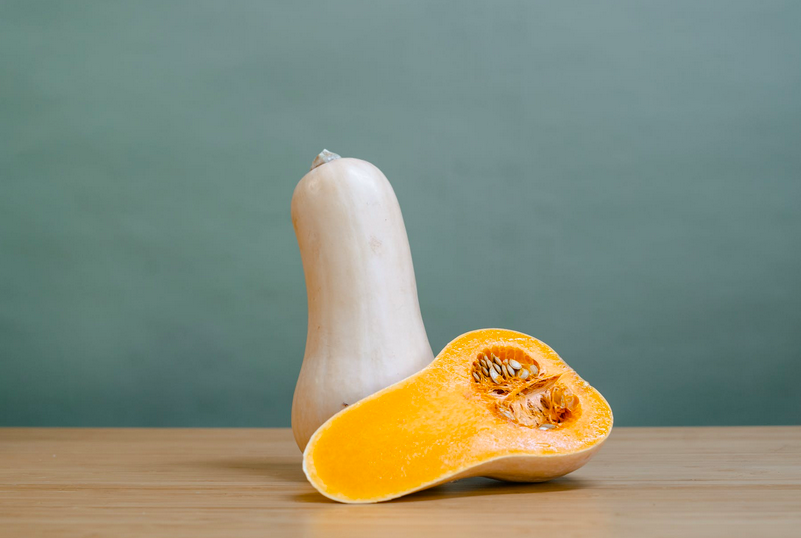
Sweater weather makes me think of fall foods, and butternut squash is one that I love to use. It’s great for a holiday side dish or starter, and can be the star of the show if you are vegan or vegetarian.
Butternut squash can be found year round in the grocery store, but it is best from fall to mid-winter. Whole butternut squash can be stored in a cool dry place for a month, and cut butternut squash can be stored in the refrigerator for up to 5 days. Pick a squash that feels heavy for it’s size.
Join our Community of Peaceful Living Wellness Warriors
and receive a special free gift:
Our Top 5 Tips for Peaceful Living
People love the convenience of buying butternut squash pre-cut in the grocery store, but it does not last long and is often mealy when you open the container to use it. It is best to cut it yourself but many find it daunting. I am here to help! I have created this quick video to show you how to cut a butternut squash safely and easily.
Once you have mastered this task, you are ready to go. There are so many possibilities when it comes to butternut squash. Soup, roasted, on a salad, mashed, stuffed, etc.
My butternut squash soup is famous with my clients. It has very few ingredients and it’s smooth and creamy without any cream added. I top it with roasted and salted pepitas for a textural crunch. Here is how you make it. Sautee a diced onion and chopped celery stalk with olive oil until softened. Add the cubed butternut squash, salt, pepper and enough chicken or veggie broth to cover. Bring to a boil, reduce to a simmer and cook with a lid on until the veggies are soft. Using a blender or immersion blender puree the soup until smooth. To control the thickness of the finished soup, remove some liquid before pureeing. Add back extra broth as needed to thin out the soup. Check seasoning and adjust to your taste with salt and pepper. Easy recipe and a great starter for a holiday meal.
Roasted butternut squash is versatility at it’s best and a great option for meal prep. I love how the squash gets caramelized in the oven. Roasted butternut squash can be eaten as a side dish alongside a protein, as a main component of a dish for a vegan or vegetarian over a grain like quinoa for protein, as a topper for a salad or as a snack right from the fridge. To roast your butternut squash, cube it in small pieces so that it takes less time to cook. On a baking sheet with rimmed sides, place your butternut squash in a single layer, coat with olive oil (careful to use just enough to coat, but not drown them), sprinkle with seasoning of your choice (simple salt and pepper is great), toss so everything is evenly coated and roast in a 400F oven until squash is fork tender. Toss halfway through cooking time so that all sides get nice and roasted. If you want some color on your squash, pop under a low broiler for 2-3 minutes, but watch carefully so that it does not burn.
Have you ever had a mashed root vegetable in place of mashed potatoes? You can do the same with butternut squash. The sweetness in the squash is a great compliment to many dishes. To make mashed butternut squash, place cubed squash in a pot of cold water and bring to a boil. Cook until fork tender. Drain and put back into the pot on low. Mash the squash with a potato masher or a fork until it’s as smooth as you like it. The low heat will help remove excess water from the squash. Turn off the heat once mashed and add in butter and salt and pepper to season.
Lastly, butternut squash can be stuffed. It can be stuffed with meat or a grain so you can choose to make it vegetarian as you wish. To stuff a butternut squash you are not going to prepare it as you see in the video. You need to keep the squash whole and unpeeled. Wash the outside of the squash and with a large sturdy knife, cut the squash lengthwise so that you have two equal halves and you have exposed the lower section with the seeds. Scoop out the seeds and you are ready to go. It helps when making stuffed squash to pre-roast it so that you are basically warming the stuffing ingredients with the squash before serving. Add a little oil and salt and pepper before placing it in a 400F oven and roast until just fork tender.
With the squash being whole this will take longer than the cut up squash. It will take at least 30 minutes, maybe longer. While the squash is roasting you can prepare your stuffing. This is where you can get creative. Do you want Southwestern, Italian, Indian, Thai flavors? Do you want vegetarian or do you want to add meat? Do you want to use rice, quinoa, farro or barley? This is where you get to make it your own. If using meat, cook your meat fully in a pan and season it accordingly. You can add in diced tomatoes and add in the spices you choose. Mix in your cooked grains before adding to the squash in the oven. If you want to add in extra veggies, you can sautee them in the pan with or without the ground meat. Onion, scallion, zucchini, spinach etc. would all be great.
When your mixture is done, add it to the hollowed out portion of your squash in the oven and bake for 10 minutes so all the flavors marry. You can even top it with shredded cheese before finalizing the baking. If you feel like you need more space to stuff, scoop out some extra flesh of the roasted butternut squash. So you don’t waste any, mix the extra butternut squash with your extra stuffing mixture and place in a small baking dish. This could be an extra portion or even an extra side dish for another meal.
The possibilities are endless. I hope you try out some of these recipes. Please let me know how you like them at debbie@theeffortlesskitchen.com. And if you like these tips you may enjoy one of my classes. Visit my website to see my current menu for live classes as well as recorded classes.
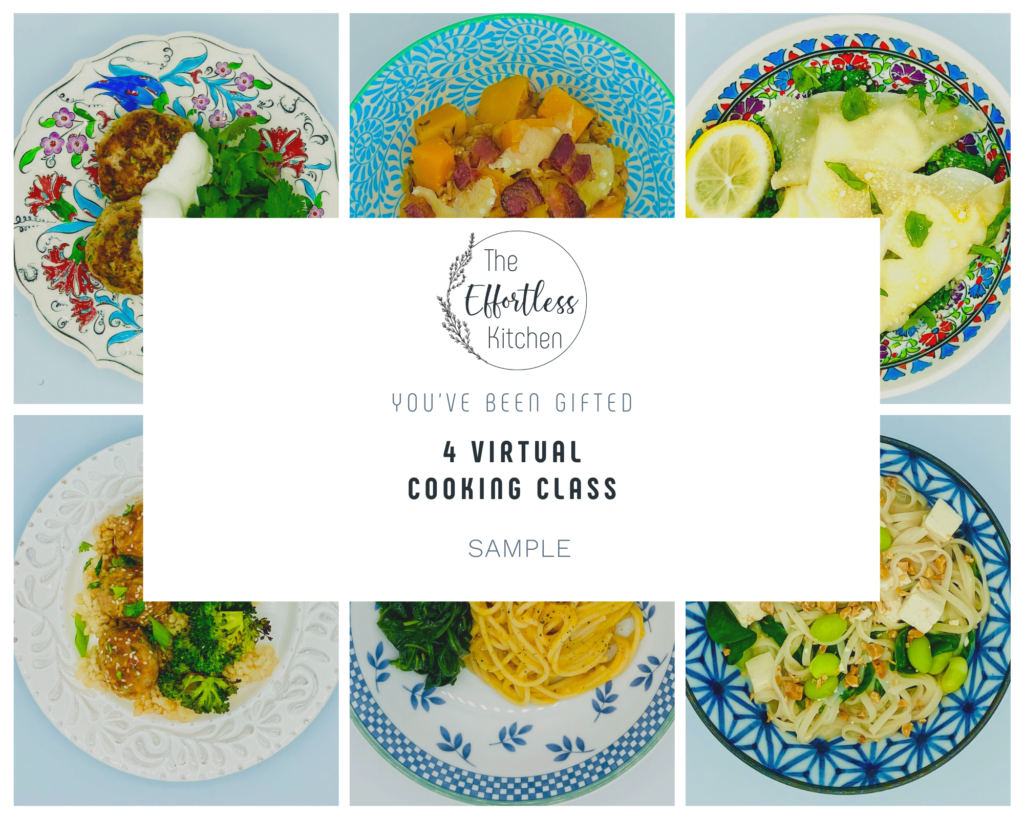
If you have a foodie in your life, I have the the perfect holiday gift idea for you. Gift an experience this year with The Effortless Kitchen’s virtual cooking classes. You pick the amount (one class for $30 up to 8 classes for $200) and they get to choose their classes. It’s also really fun to take the class with your friend or loved one especially if you are separated by distance as a way to connect while cooking together.
Use this link to purchase and you will something similar to the picture below to gift to them.
See you in the kitchen!
Debbie
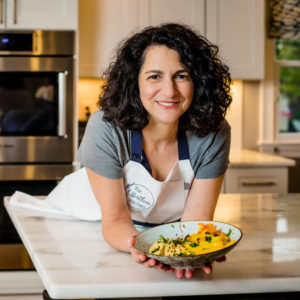
DEBBIE BROSNAN
Debbie is a personal chef turned virtual cooking class instructor. She started The Effortless Kitchen in 2019 making dinners in her client’s homes and transitioned to virtual due to Covid. Debbie is a passionate self taught home cook who began her journey cooking along side her mother and grandmother as a young child. Her focus is on healthy food that tastes amazing using simple recipes so that those who take her classes will continue to make those dishes and others in their own kitchens. The Effortless Kitchen offers weekly classes, custom parties and corporate events and all are virtual, interactive and fun. Recorded classes are now offered for those who cannot make the live events. Culinary travel is being added into the mix in 2022 with the first adventure in March to Napa. Debbie is thrilled with the shift in her business as she can reach more people and share her gift with everyone. Through The Effortless Kitchen’s classes, Debbie is creating a community of people who are both comfortable and uncomfortable in the kitchen all brought together by the common thread of food.